Tourbillon build
Re: Tourbillon build
Thanks Ron, and good to get that feed back for what your doing & seeing as results. Those are details missing in his videos for sure. Maybe for brass gear teeth the heat treat can be a little off and still work well enough. But if your going to do this, then why not do so to the level you are for when it just might be a whole lot more important. And not many have made, heat treated and sharpened there own gear cutters. A real accomplishment right there. Just don't forget out of habit and pick HSS rpms by mistake or drop them on the concrete. 
Re: Tourbillon build
More work completed
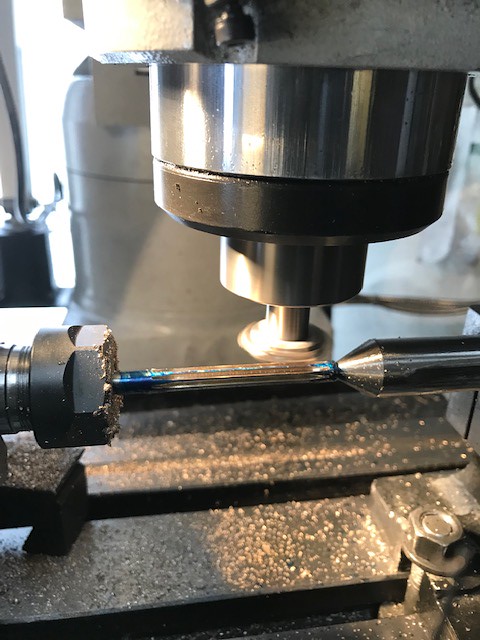
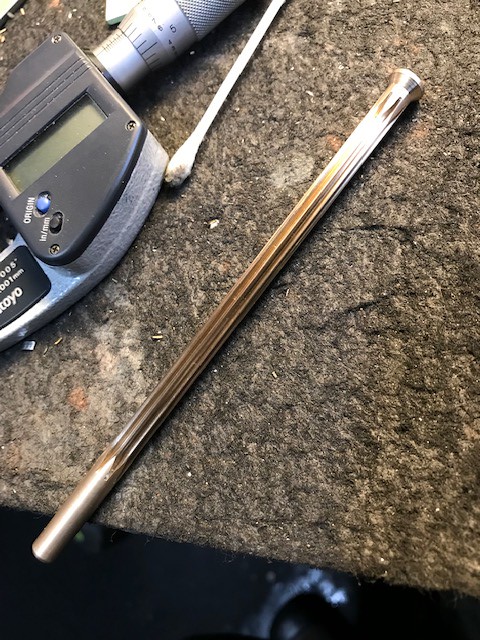
I put the Cycliodal cutters to the test the other day and was pleased with the outcome. It took me three times mind you as I learned sometime new every time I set up to do the pinions. One thing in particular is taking into account that when finishing the parts even with 2500 grit abrasives you loose dimension. Since they need to be finished to a high level even moving from 1500 grit abrasives to 2500 grit can be the difference between making or breaking the outcome. So the trick was to figure out just how much was needed to be left on the material to account for that lose. The dia. of the spindle must be spot on, for which the second and third go were turned on centres to make sure of the outcome without taper. The first set were ok but thinking I could use soft jaws for this small/tight job was wrong. It wouldn't cut it as these parts are so small they could shift easily under pressure so I switched to the 5C with me shop made collet stop and a toothpick trick I got from Robin Renzette to expand the 5C collet, since the pinions were a touch over the dims of the collet. The pinion spindle was lapped down to 60 micron finish prior to being parted into sections and the rest of the surfaces finished to 2500 grit then polished with Tripoli compound.
I'm happy to say these parts are 100% spot on (as afar as my Mitutoyo metrology is able to detect) Not a tenth over or under in every dim. Two of the three pinions have a shoulder and the bottom one in the pic is threaded 1-72. One thing I have learned is the smaller you go the harder it is to maintain a high level of accuracy as it's not only hard to hold the parts but hard to see them. I did most of the lathe work under a X25 loupe.
Vision is not seeing things as they are, but as they will be.

Re: Tourbillon build
This is fascinating!
Re: Tourbillon build
More work completed.
This is the first time using my dividing plates which I bought at the same time as my smaller 6" rotab from the same supplier but never used them until now. When I went to mount the one dividing plate to the rotab I found out the holes don't line up! I couldn't believe it but should have figured as much as I remember someone else here saying the same thing. So I had to fix the problem before doing the work.


Once I got everything set up (which seems to take forever if you want precision) I had to figure out the rotab diving plates and how they worked. A quick trip to YT and I had a good idea of how where to start. It took me three tries to get the first wheel completed as the first time I made a mistake and turned the crank handle backwards once not realising it LOL I cut one tooth in half! That's all it takes to screw up the part so back to the beginning. The second part was almost done, one tooth left literally and half way thought the super glue arbour failed and the part popped off the spindle
 So the third attempt had the tail-stock support set up for the win!
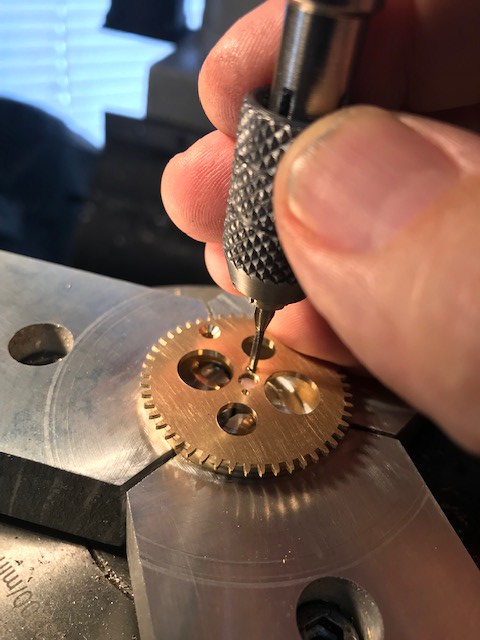
And here's the results


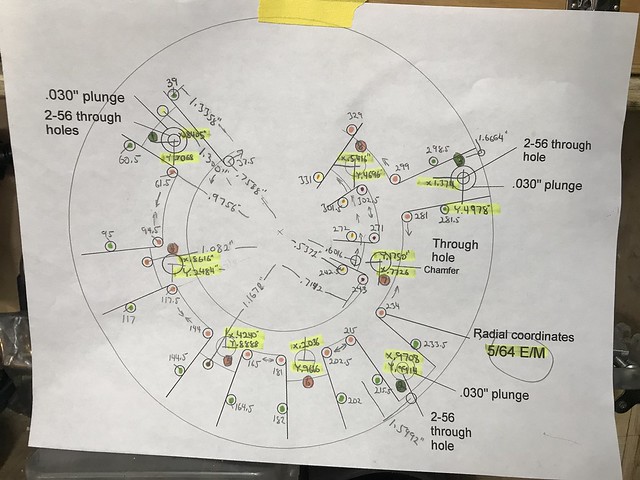
The depthing tool proved invaluable as it confirmed or denied my previous pivot spacing without question. Now I can go back to my drawings and update the exact location for the pivots.

Lots of tapping for screws, the smallest being 0-80

More pics to come.....
This is the first time using my dividing plates which I bought at the same time as my smaller 6" rotab from the same supplier but never used them until now. When I went to mount the one dividing plate to the rotab I found out the holes don't line up! I couldn't believe it but should have figured as much as I remember someone else here saying the same thing. So I had to fix the problem before doing the work.
Once I got everything set up (which seems to take forever if you want precision) I had to figure out the rotab diving plates and how they worked. A quick trip to YT and I had a good idea of how where to start. It took me three tries to get the first wheel completed as the first time I made a mistake and turned the crank handle backwards once not realising it LOL I cut one tooth in half! That's all it takes to screw up the part so back to the beginning. The second part was almost done, one tooth left literally and half way thought the super glue arbour failed and the part popped off the spindle
And here's the results
The depthing tool proved invaluable as it confirmed or denied my previous pivot spacing without question. Now I can go back to my drawings and update the exact location for the pivots.
Lots of tapping for screws, the smallest being 0-80
More pics to come.....
Vision is not seeing things as they are, but as they will be.
Re: Tourbillon build
A few more pics....
Hand filling bevels
Some hand work mixed with mill work

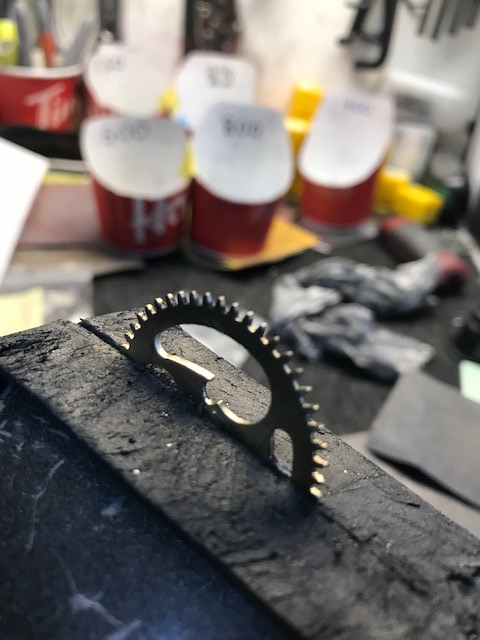

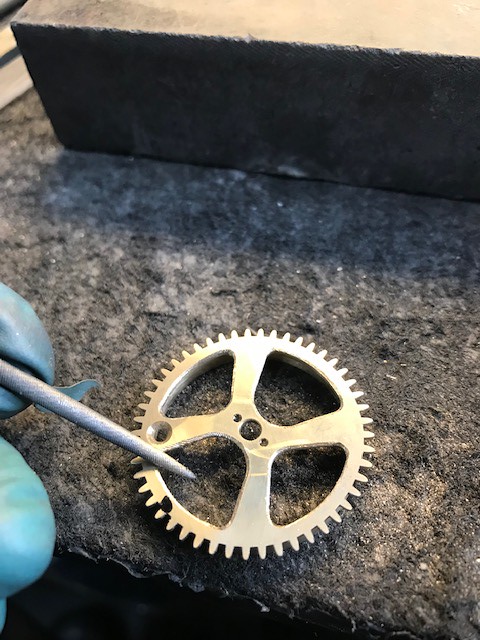
Finished wheel with 0-80 screws and the transfer wheel. While the picture doesn't do this part justice the bevels turned out excellent with even crisp edges and tangent curves.


There's a lot more finishing required but for now this gives a pretty good idea of the final look. It also shows if there are any scratches not seen until polished.
Hand filling bevels
Some hand work mixed with mill work
Finished wheel with 0-80 screws and the transfer wheel. While the picture doesn't do this part justice the bevels turned out excellent with even crisp edges and tangent curves.
There's a lot more finishing required but for now this gives a pretty good idea of the final look. It also shows if there are any scratches not seen until polished.
Vision is not seeing things as they are, but as they will be.
Re: Tourbillon build
Good luck.Have fun.Be safe.
Leo
Otto Von Bismark
Re: Tourbillon build
Nearing the end of the Tourbillon build, here's some pics....
The smaller the parts the longer they seem to take, if you need accuracy...here's a 0-80 threaded sleeve

A small bridge


the bottom wheel supporting bridge...


Hope to have the whole build completed before xmas.
The smaller the parts the longer they seem to take, if you need accuracy...here's a 0-80 threaded sleeve
A small bridge
the bottom wheel supporting bridge...
Hope to have the whole build completed before xmas.
Vision is not seeing things as they are, but as they will be.

Re: Tourbillon build
I was just wondering how this project was coming along a few days ago!
You are the RT King!
You are the RT King!
Glenn
Operating machines is perfectly safe......until you forget how dangerous it really is!
Operating machines is perfectly safe......until you forget how dangerous it really is!

Re: Tourbillon build
Nice! I figured out that I don't like working on watches. Maybe during the x-mas break I will tackle my stopwatch again. Jeez all it needs is one pivot.
Standards are so important that everyone must have their own...
To measure is to know - Lord Kelvin
Disclaimer: I'm just a guy with a few machines...
To measure is to know - Lord Kelvin
Disclaimer: I'm just a guy with a few machines...

Re: Tourbillon build
Impressive!
Respect...
RussN
Respect...
RussN
Re: Tourbillon build
Thanks gentlemen!
Vision is not seeing things as they are, but as they will be.