Thank you for taking an interest. Here is the reverse gear oval diagram for equalised lap.
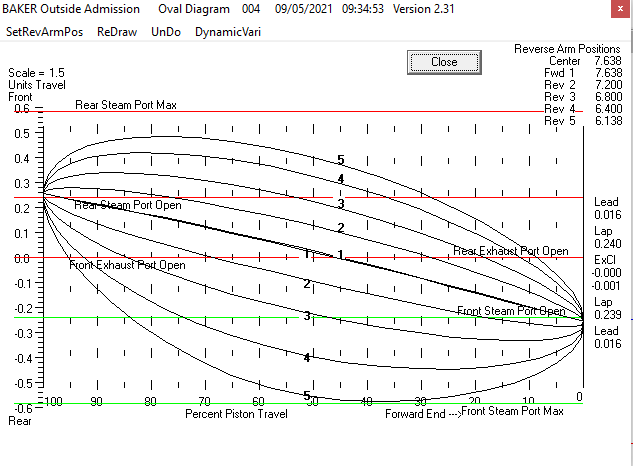
The exhaust ports are still biased by 5% of stroke away from the mid point and I am getting more valve stroke at one end than the other. That, I think, is due to reverse rather than the lap modification. Thinking about the 5% bias some more, I suspect that this might cause the 'galloping horse' effect described by Moron. We shall see in due course!
I have been trying to increase the cut-off as suggested. I thought of just pushing it further into forward gear but the yoke is already at 26.5°against a recommended maximum of 25° (KN Harris in Model Engineer). I have therefore increased the stroke at the return crank from 2 3/8" to 2 5/8" and achieved this chart (with the unequal lap again).

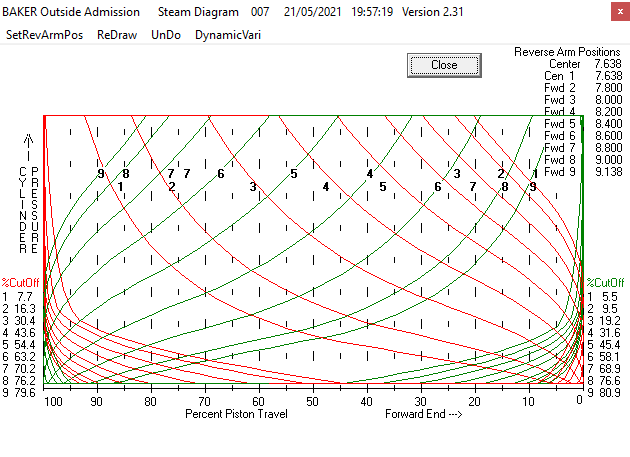
The exhaust ports are opening at mid stoke in mid gear and I have even lead. In the steam chart below, for forward gear, I have achieved another 4% cut-off.

The same chart for reverse has also increased the cut-off by 2% but is significantly less even.
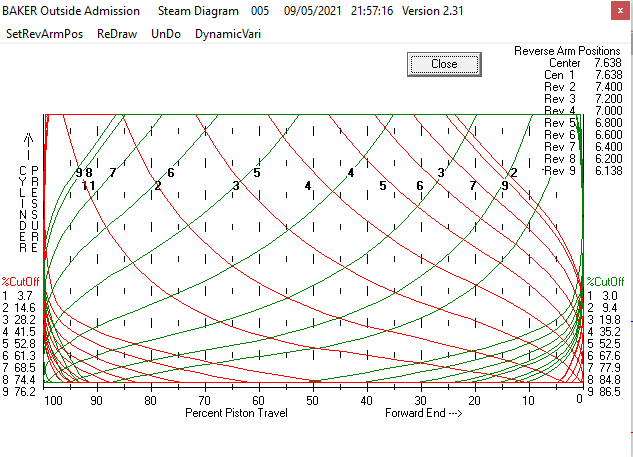
I feel inclined to live with it and 'have a go' to see what happens. These are my final charts with the even lap and increased eccentric stroke in forward gear:


If anyone can offer any thoughts, comments or observations, then I would very much appreciate them!
Steve