ZOOM....
Now that's a forming tool and 3/4 if I ever saw one.
Forming boiler sheets for three 3/4-in. scale Virginias
-
Bill Shields

- Posts: 10551
- Joined: Fri Dec 21, 2007 4:57 am
- Location: 39.367, -75.765
- Contact:
-
Andypullen
- Posts: 2166
- Joined: Thu May 22, 2003 8:17 am
- Location: Bel Air, MD
The formers were made from 2-in. aluminum plate, milled by hand on Duane's Lagun MANUAL mill. The excellent fit of the wrapper with the backhead is because the formers were dowelled to match the backhead formers.
On my previous locos, the formers were wood or steel as recommended by the designer (LBSC, Morewood, & Hiraoka.) When i started this i tried to re-use the formers from the 4-4-0, but they were dried out and split, so made a set of backhead and tubesheet formers out of 1/4-in. steel, just like LBSC recommended. That's too thin to allow removal of the formed copper without hardwood backing the steel, and in Duane's estimation, would result in less than acceptable tolerances. (Hey - It's boilermaking!) Duane made new formers from thick aluminum plate, and as noted above, they are all dowelled to match. Making the wrapper formers the same way made sense and certainly ressulted in excellent fit of the parts. It has been a real pleasure working with a retired tool and die maker, whose personal opinion is that a tolerance of +/- 0.0005 in. is too sloppy.
The firebox wrappers were annealed three times, the straight top wrappers were annealed twice, and the waggon-top wrapper, even with the flats on each side, was only annealed once.
Thanks for your comments.
Show us the backhead formers, please!
Great Pics, thanks for sharing!
Do you have any of the backhead formers?
Do you have any of the backhead formers?

My kind of guy!Andy R wrote: It has been a real pleasure working with a retired tool and die maker, whose personal opinion is that a tolerance of +/- 0.0005 in. is too sloppy.
The benefits of working closely are often not readily recognized, where effort expended early on pays dividends down the road, as in this example.
That's not a commonly accepted theory today, where many folks expect instant gratification and are unwilling to dedicate the required effort that accompanies success-----and are bewildered when they fail.
<sigh>
Very nice job, all the way around!
How was the copper pickled? Sulfuric?
Harold
Steamin,
The backhead, throatplate, and firebox formers have been used to hold and register those formed sheets for drilling and reaming the appropriate holes (tubes, stays, bushes, etc.) so they show "just a little bit" of use.
Harold,
The copper was pickled in surplus plastic buckets filled with a mix of water and sulfuric acid. About 15 minutes in a 10:1 mixture seems to be about right.
Time spent on formers, tooling, and design/redesign has been more than double that spent so far on actually making things.
Soon the big piles of parts will be assembled to give us some of that gratification for work done carefully.
Re: Forming boiler sheets for three 3/4-in. scale Virginias
I had not realized how long it has been since i started this thread. I should close the loop.
In digging through the computer, i found fewer progress photos than i had remembered taking.
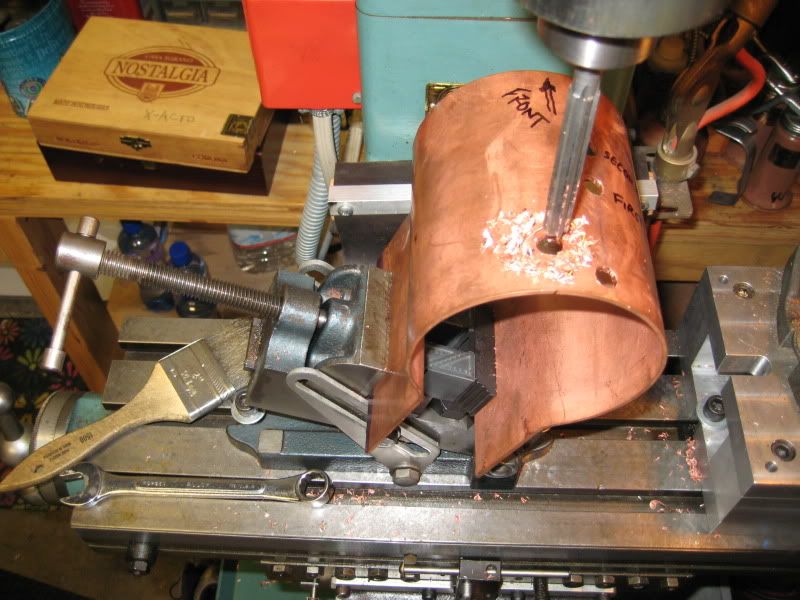
Here's a photo of reaming for the gauge-glass bush:
In digging through the computer, i found fewer progress photos than i had remembered taking.
Here's a photo of reaming for the gauge-glass bush:
Re: Forming boiler sheets for three 3/4-in. scale Virginias
Once all the pieces were made, it was important to check that they all fit. Careful adherence to dimensions and tolerances is important.
Here's three photos of trial fitting the pieces:
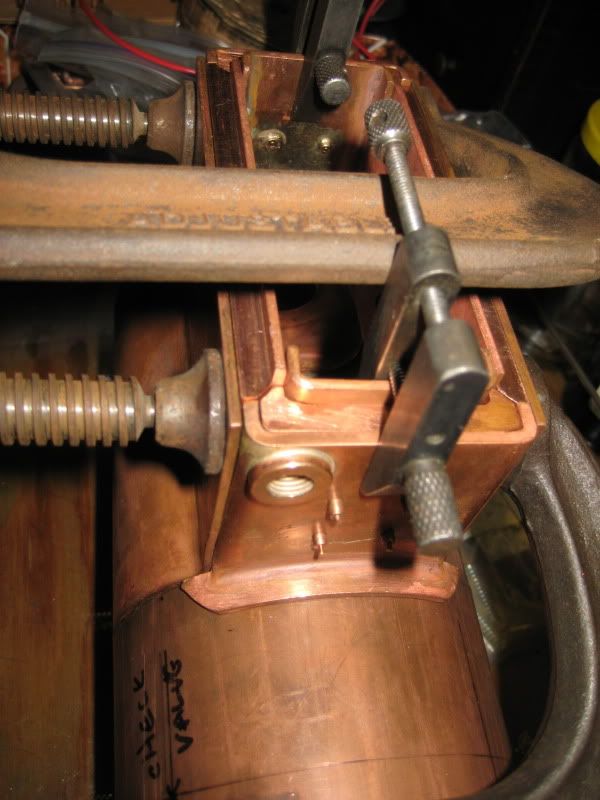
I misplaced the photos of the soldered tubes to the tubeplate.
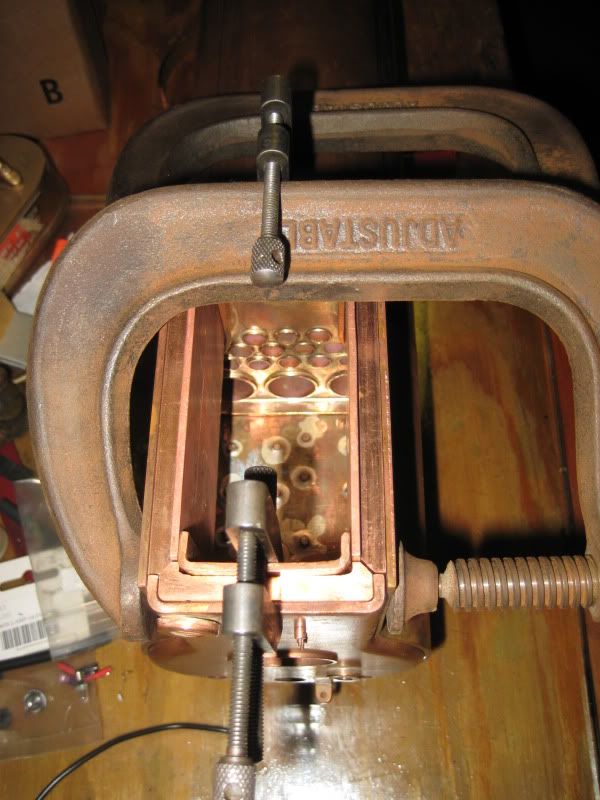
Here's three photos of trial fitting the pieces:
I misplaced the photos of the soldered tubes to the tubeplate.
Re: Forming boiler sheets for three 3/4-in. scale Virginias
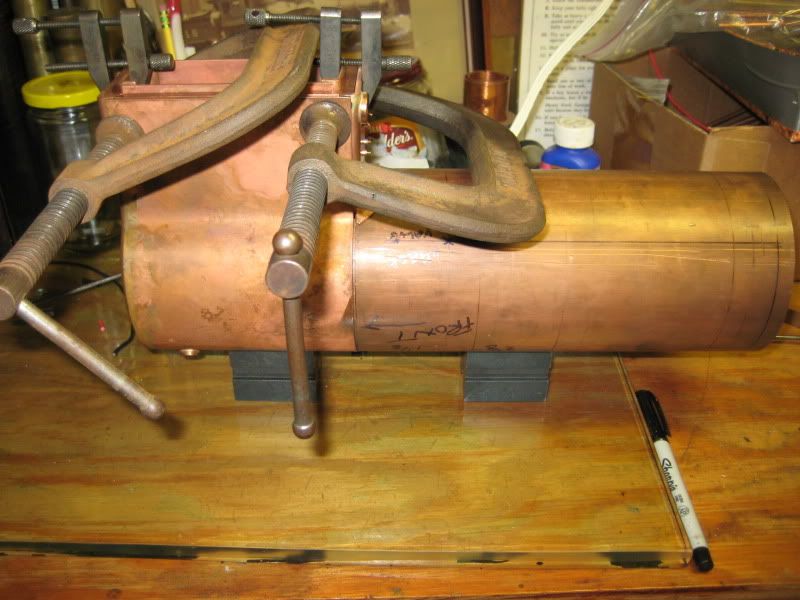
here's a photo of the throatplate soldered to the barrel. You can compare it to one in the previous post.
These are a bit out of order!
These are a bit out of order!
Re: Forming boiler sheets for three 3/4-in. scale Virginias
Here's two photos of the firebox inner sheet soldered to the rear sheet, plus the crown stays.
These were done before the series of photos above regarding the trial fitting.

I did not use enough rivets to hold the parts together. On the next boiler i'll space them at 3/4 inch around those compound curves.
These were done before the series of photos above regarding the trial fitting.
I did not use enough rivets to hold the parts together. On the next boiler i'll space them at 3/4 inch around those compound curves.
Re: Forming boiler sheets for three 3/4-in. scale Virginias
Here's a photo of tapping the inner firebox sheet for stays:
And here they are all tapped on the righrt side. It is time to remove them and drill and tap on the other side.
[Corrected double-post of photo.]
One thing that i should have done was pay more attention to fluxing the threads of both the stays and the holes in the sheets ... that led to a lot of trouble when silver soldering.
Last edited by Andy R on Wed May 23, 2012 6:07 pm, edited 1 time in total.